So, after thinking about it for a long time, you finally decided to take the plunge and go hiking. Good for you. I can assure you right here, right now, you won’t regret it. Packing a backpack for hiking is all about being able to anticipate the expected, but also, particularly, the unexpected. You should always consider it’s better to have packed an item and not need it at all than to need an item and not have it with you. No doubt, how to pack a backpack is a premier question to be answered.
You have a place in mind, you know where you’re going, and you know who you’re going with, but how to pack for hiking? What are some of the things you need in your backpack? You’ll go hiking, how to pack like a pro then? If you want some answers, just keep reading.
Why You Need a List of the Things You Need to Pack
First things first: Will you go hiking for just one day, a whole weekend, or maybe several days? Once you know this, you can pack up all the stuff you need to meet your real and possible necessities. Say, you will be going on a one-day hike. You need to pack considering the following purposes:
1. Avoid Getting Lost
You need to stay orientated. If you’re doing this, you’re gonna do it right. You need to have an idea of where you are AT ALL TIMES. To avoid getting lost, a map and compass will serve the purpose just fine. Even when you’re familiar with the place you’re visiting, or you’re going to an urban park, you should be able to find the north and to find your way through landmarks that you can easily recognize on a map.
Of course, your phone and GPS are useful tools too, but nothing is more reliable than a map and a compass. You’ll value this skill if you decide to take your hiking to the next level.
2. In Case You Or Someone In Your Group Gets Injured
You never know when a first-aid kit will come in handy. If you need it or not (let’s hope not) during your hike, packing it with the rest of your gear proves to be better than not carrying one at all. If you’re on a budget, we highly recommend you check out this First-Aid Kit on Amazon.
Not only, it is a great value but it’ll help you notice what a good First-Aid kit must have. Look for a hard shell, waterproof case kit that doesn’t weigh much nor takes tons of space in your pack. Above all, look for a kit that contains just as many supplies or at least, the very essential ones: bandages, band-aids, antibiotic ointments, alcohol pads, gauze, and a first-aid guide.
3. Walk Safely During The Night
You must carry either a headlamp or a flashlight with its corresponding spare batteries. If you were meant to have enough daylight during your walk, but something delayed you or you decided to stop and camp for the night, trust me on this one, you want some extra light.
4. Sun Protection

A cap and a sun protection ointment will work wonders to keep you from getting sunburned. Also, taking sunglasses with you is helpful to avoid temporary blindness due to the sun itself or snow.
5. Prevent Hypothermia
The number of clothes you take with you, especially for the insulation you want to bring along depends primarily on the weather forecast (even when the forecast predicts mild weather, prepare yourself for the chance that conditions will turn colder, wetter, and windier) and if you’re camping or not. When packing for a hike, avoid cotton for it gets wet easily and won’t provide good insulation; consider layering your clothes. If you’ll be trekking outdoors the whole day, you should probably need a seat pad and a jacket that won’t get wet or cold, a good sweater, a woolen hat, and a pair of gloves along just in case you’re out after sunset. If you’re camping, the above will serve you just right.
6. Set Up a Fire
Starting a fire might be something you’re not planning for unless you know for sure you’re camping. You may have to stay out a little longer because you’re lost or injured. You have two options: you could take fire-starting gear with you or you could start it from scratch yourself.
7. Get Good Nutrition
It’s a fact: all that physical activity when you’re out there enjoying yourself will have you craving food. Bring snacks with a good fat-carb-protein balance or the all-time classic sandwich to keep you fueled as you go. A trail nut mix or chocolate bars are great ideas for energy snacks.
8. Get Good Hydration
For hydration, you need to have as much water as you can possibly carry in your backpack without making it extremely heavy. Bottles are a good choice but water reservoirs make an even better one. They can contain as much liquid as a bottle, but they can fit in your pack filling empty spaces. You can take with you a water filter or a purifier in case you need some more water. This last one is optional: have a small bag of soluble isotonic drink powder. It can help restore the minerals you lose when sweating.
9. Fix What Needs to Be Fixed
When you’re out there, you’re likely to tear your gear or break something. In case it happens, a multi-tool, some safety pins, a roll of duct tape, and, of course, a little bit of creativity can be used to patch or repair pretty much anything.
10. Emergency Shelter
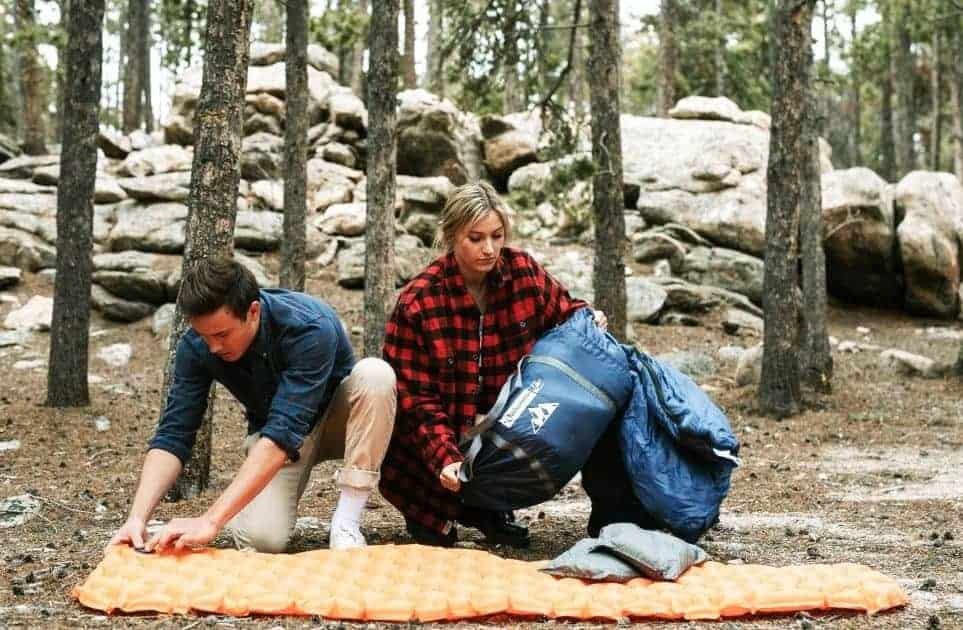
It’s important for you to include in your equipment a few emergency shelter things, such as an emergency bivy, an emergency blanket, or a sleeping bag. In case you need to spend the night outdoors, you should never sleep on the floor without any sort of protection because the floor would suck all the heat right from you.
If your pack is big enough, you’ll find it easy to just put everything inside. Otherwise, you may have to learn to attach things to your pack using the Molle straps on your pack and some chords. It’s fairly easy to do it. Maybe you don’t feel like learning to tie knots, and if that’s the case, you could buy some adjustable straps.
The purposes listed above make up for the single most vital things you always want to bring along with you when you go outdoors. However, to complete your equipment you may keep other things in mind. Suggested items go as follows:
|
ESSENTIALS |
CLOTHING |
OPTIONAL | TOILETRIES |
|---|---|---|---|
| Hiking Backpack |
Thermal underwear |
Trekking poles | Toilet paper |
|
Hydration Pack |
Hiking pants |
Camera | Menstrual products (for women) |
|
First Aid kit |
Hiking shirts |
Hiking GPS | Bathing suit |
| Personal locator beacon | Extra T-shirt | Hiking watch | Quick-dry towel |
| Hiking boots | Hiking shorts | Sunglasses | Bath towel |
| Backpacking food | Hiking jacket | Hammock | Hand sanitizer |
| Camping stove | Woolen Socks | Camping tent | Waste bags |
| Insect repellent | Rain pants | Camping chair | |
| Trail map | Rain Jacket | Two-way radio | |
| Fleece | Sleeping pad |
Once you managed to check off your list of all of the above, you’ll have to make sure you can pack them all together smartly. The arrangement of the items in your pack can make a huge difference between having to take everything out of your pack or simply opening it and pulling something out.
Packing Like A Pro
You have to consider dividing your pack into the following areas:
- Bottom: Place here all your bulky things, like clothing or shelter.
- Core: Put your heavier items here. For example, food, gear to start a fire, or repairing tools.
- Top: Pack here all the stuff you will need for sure on the trail, like your insulated jacket, snacks, and water.
- Accessory pockets: Good for the items you need urgently or often, like your first-aid kit or maybe even a camera.
- Lash Points: Good for oversized equipment that would take up too much space inside your pack.
Also, remember to keep all the heaviest gear close to your back. By doing so, you make it easier to balance all the weight. Thus, you won’t get tired too fast when you’re walking. If you want to have some more space in your backpack or to keep everything a bit more organized, you could use compression sacks; in them, you can put some extra clothes, a tent, or a sleeping bag.
Keeping Your Backpack Light
Again, when you pack for hiking, you must plan for your worst-case scenario, not your best. Let’s say you get a sprained ankle in the middle of your trip and you have to carry a very heavy pack back to civilization. Doesn’t sound appealing, right? Bear in mind too that the weight won’t be a problem at first, but what’s it gonna be like after you’ve spent a few hours out there? It’s a good idea to get the lightest possible weight in your pack.
There are two main factors to take into account once you decide to pack. First, how many days will your trip last? Second, what’s your physical condition? There are some guidelines to help you have an idea of what’s anatomically adequate. They go by percentages of your total body weight.
Guidelines
- A pack for camping or something up to a 7-day hike should not weigh more than 20 percent of your body weight.
- A one-day pack should not weigh more than 10 percent of your body weight.
Take a hiker who’s 165 pounds, then, according to the above, this person should not exceed a limit of 33 pounds (~15 kg) when they’re going on a 7-day hike or 16.5 pounds (~7.5 kg) if it’s a one-day hike.
These guidelines are useful when you’re beginning to hike. They’re guidelines, not fixed rules. The truth is you should be able to find an optimum weight through experience. The more you go on hikes, the more you’ll know what works best for you.
Trying to keep your pack as light as possible should never mean leaving out any of the essential items you do need. To keep the weight of your gear as light as possible, you can avoid taking unnecessary items with you (i. e. extra clothing or food) and you can replace old gear with new ultralight gear. It, obviously, means investing more money but it’s definitely worth it.
Find The Right Backpack Size For You
A pack’s capacity is always given in liters. You can choose the backpack that serves your purposes best once you know the duration of your trip. You can find some guidance in the following table.
|
BACKPACK TYPE |
DURATION OF TRAIL |
CAPACITY |
|---|---|---|
|
Weekend Pack |
1-3 nights | 30-50 liters |
|
Multiday pack |
3-5 nights | 50-80 liters |
|
Extended-trip/Expedition Pack |
5 plus nights | 70 liters or larger |
Multiday packs are the safest bet when you’re just getting started because they’re useful not only for short trips but also, for trips up to five days. Remember at all times that it’s not a good idea to cram your pack and, especially, to do so only because you have some extra room in your pack.
Final Thoughts on Packing
This is just a beginner’s guide to packing. We’ve suggested items to take with you when you go hiking, and we’ve suggested how to pack and choose a backpack that best meets your needs. Truth be told, we can only give you a good hint on how to get started, but all the knowledge you need will come from your experiences when you’re out there. Your trips will allow you to perfect the art of packing and soon enough, it will be you the one who gives advice to other newbies.
If you like this article make sure you share it on social media and if you think we missed something, you can let us know in the comments.

